switching to clocksource tsc
boot grub 按 Tab 然後空格在後面加入 acpi = off
2018年10月3日 星期三
2018年9月27日 星期四
Fedora Changes/WaylandByDefault
Source:https://fedoraproject.org/wiki/Changes/WaylandByDefault
Contents
[hide]🔗 Wayland By Default
🔗 Summary
Change the default session selection in gdm to prefer the Wayland-based GNOME session over the X11-based one.
🔗 Owner
- Name: Matthias Clasen Ray Strode Jonas Ådahl Olivier Fourdan Marek Chalupa
- Email: mclasen@redhat.com rstrode@redhat.com ofourdan@redhat.com jadahl@redhat.com mchalupa@redhat.com
- Release notes owner:
- Product: Workstation
- Responsible WG: Workstation
🔗 Current status
- Targeted release: Fedora 25
- Last updated: 2016-08-23
- Tracker bug: 1277927
🔗 Detailed Description
We will change GDM to use wayland by default for GNOME. The code will automatically fall back to Xorg in cases where wayland is unavailable (like nvidia). Users will be able to disable wayland by setting WaylandEnable=false in /etc/gdm/custom.conf but there will no longer be two separate menu items for GNOME on Wayland and GNOME on X11.
🔗 Benefit to Fedora
Using Wayland instead of X gives a much better basis for isolating applications from each other and the system.
🔗 Scope
- Proposal owners:
- merge the gnome-wayland.desktop and gnome.desktop into one file that is distributed into both /usr/share/wayland-sessions and /usr/share/xsessions. since they have same filename, the wayland one will "win". - DONE
- Make gdm hide Wayland sessions from the session chooser if we know they will not work (because the login screen had to fall back to X) - DONE
- Close remaining feature parity gaps between the Wayland and the X11 session:
- See the Wayland features page for a complete list of features.
- game support - Wayland and mutter are DONE, missing support in Xwayland and SDL
- details panel in control center needs to show hardware graphics device
- input methods - DONE
- on-screen keyboard - DONE
- hi-dpi support - DONE
- tablet support - GTK+ side DONE, control-center side still in progress
- startup notification - DONE
- touch proxy for xwayland - DONE
- accessibility features - Screen reader and visual bell are DONE
- output rotation / randr like features - DONE
- triple-monitor setups (like [this])
- primary selection - DONE (discussion)
- dnd actions and cancellation - DONE
- Other developers:
- GTK+ applications that use X11-specific APIs need to be patched to explicitly use the GDK X backend
- Popup and dialog placement issues in applications
- Release engineering: No release engineering changes needed
- Policies and guidelines: No policy or guideline changes needed
🔗 Upgrade/compatibility impact
Systems using certain graphics hw or graphics drivers (matrox, qxl) may have problems running the Wayland session. In these (rare) cases, users may have to configure gdm to use X11 (although automatic fallback should work most of the time). If we don't manage to close all the feature parity gaps entirely, then users relying on those features may have to choose the X11-based session.
🔗 How To Test
- Boot a fresh F25 workstation install.
- Verify that the login screen is running under Wayland (you can do so by looking for a process called gdm-wayland-session in ps -ef output)
- Verify that the session chooser offers 'GNOME', 'GNOME on X11' and 'GNOME Classic', and that 'GNOME' is selected by default.
- Log into all three of these sessions and verify that 'GNOME' gives you Wayland (you can verify this by bringing up the GTK+ inspector in a gtk3 application and checking what backend is used), while the other two end up with X11.
- Change the gdm configuration by adding WaylandEnable=false and reboot
- Verify that the login screen comes up under X
- Verify that only X-based sessions are offered in the session chooser
- Log into the Wayland-based session again
- Use the desktop normally, and verify that there are no obvious instabilities, or Wayland-specific bugs or performance problems
🔗 User Experience
The user experience of the Wayland session is identical to that of the X session.
🔗 Dependencies
The tasks lists in the Scope section are spread across a number of upstream modules and packages: gtk3, gnome-shell, mutter, libinput, Xorg, gdm.
🔗 Contingency Plan
- Contingency mechanism: Rename /usr/share/wayland-sessions/gnome.desktop to /usr/share/wayland-sessions/gnome-wayland.desktop so it doesn't preempt the X11 session file anymore, thereby keeping the X-based session as the default and adding wayland back to the list.
- Contingency deadline: beta
- Blocks release? no
- Blocks product? no
🔗 Documentation
TBD
🔗 Release Notes
TBD
How to disable Wayland and enable Xorg display server on Ubuntu 18.04 Bionic Beaver Linux
Contents
Objective
The default Ubuntu 18.04 Bionic Beaver installation comes with Wayland enabled. The objective is to disable Wayland and enable Xorg display server instead.Operating System and Software Versions
- Operating System: - Ubuntu 18.04 Bionic Beaver
- Software: - GDM3
Requirements
Privileged access to is required to perform this configuration.Difficulty
EASYConventions
- # - requires given linux commands to be executed with root privileges either directly as a root user or by use of
sudocommand - $ - requires given linux commands to be executed as a regular non-privileged user
Instructions
Configure GDM3
As a privileged administrator user use your text editor to perform the following changes of the GDM3 custom configuration file/etc/gdm3/custom.conf.FROM:
#WaylandEnable=falseTO:
WaylandEnable=falseBy uncommenting the above line your system will use the Xorg display manager instead of Wayland next time it boots.
Reboot
Reboot your system to apply the changes.2018年9月17日 星期一
2018年9月12日 星期三
Upgrading Fedora 27 Workstation to Fedora 28
Soon after release time, a notification appears to tell you an upgrade is available. You can click the notification to launch the GNOME Software app. Or you can choose Software from GNOME Shell.
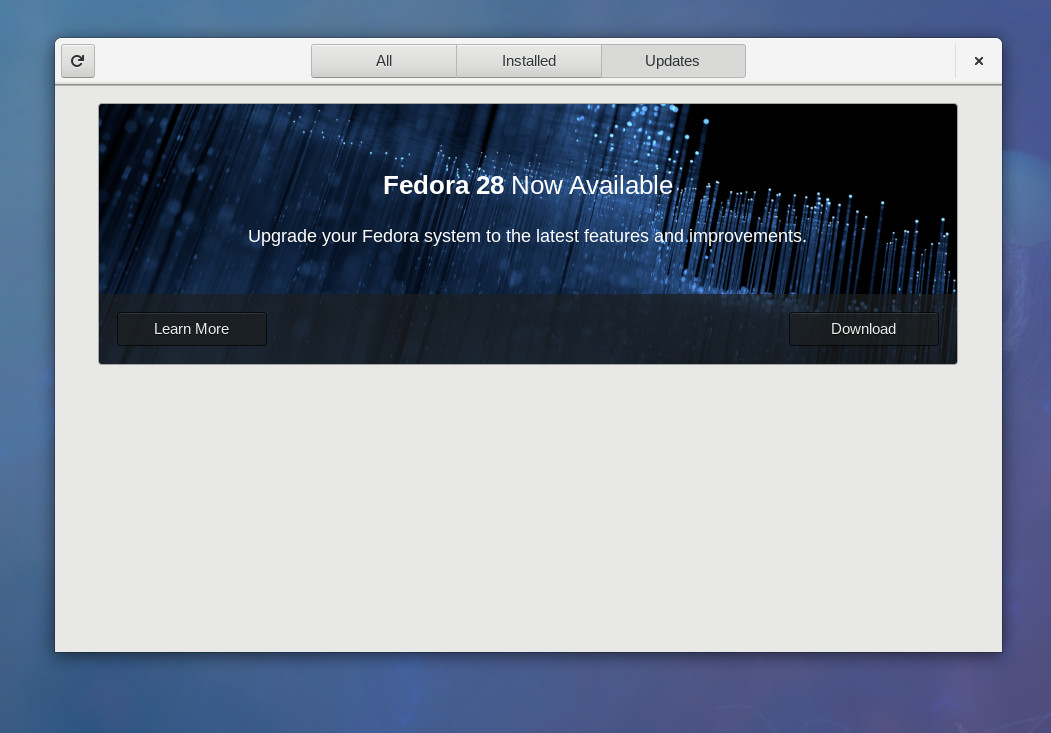
Choose the Updates tab in GNOME Software and you should see a window like this:

If you don’t see anything on this screen, try using the reload tool at the top left. It may take some time after release for all systems to be able to see an upgrade available.
Choose Download to fetch the upgrade packages. You can continue working until you reach a stopping point, and the download is complete. Then use GNOME Software to restart your system and apply the upgrade. Upgrading takes time, so you may want to grab a coffee and come back to the system later.
Using the command line
If you’ve upgraded from past Fedora releases, you are likely familiar with the dnf upgrade plugin. This method is the recommended and supported way to upgrade from Fedora 27 to Fedora 28. Using this plugin will make your upgrade to Fedora 28 simple and easy.
1. Update software and back up your system
Before you do anything, you will want to make sure you have the latest software for Fedora 27 before beginning the upgrade process. To update your software, use GNOME Software or enter the following command in a terminal.
sudo dnf upgrade --refresh
Additionally, make sure you back up your system before proceeding. For help with taking a backup, see the backup series on the Fedora Magazine.
2. Install the DNF plugin
Next, open a terminal and type the following command to install the plugin:
sudo dnf install dnf-plugin-system-upgrade
3. Start the update with DNF
Now that your system is up-to-date, backed up, and you have the DNF plugin installed, you can begin the upgrade by using the following command in a terminal:
sudo dnf system-upgrade download --releasever=28
This command will begin downloading all of the upgrades for your machine locally to prepare for the upgrade. If you have issues when upgrading because of packages without updates, broken dependencies, or retired packages, add the ‐‐allowerasingflag when typing the above command. This will allow DNF to remove packages that may be blocking your system upgrade.
4. Reboot and upgrade
Once the previous command finishes downloading all of the upgrades, your system will be ready for rebooting. To boot your system into the upgrade process, type the following command in a terminal:
sudo dnf system-upgrade reboot
Your system will restart after this. Many releases ago, the fedup tool would create a new option on the kernel selection / boot screen. With the dnf-plugin-system-upgradepackage, your system reboots into the current kernel installed for Fedora 27; this is normal. Shortly after the kernel selection screen, your system begins the upgrade process.
Now might be a good time for a coffee break! Once it finishes, your system will restart and you’ll be able to log in to your newly upgraded Fedora 28 system.
Resolving upgrade problems
On occasion, there may be unexpected issues when you upgrade your system. If you experience any issues, please visit the DNF system upgrade wiki page for more information on troubleshooting in the event of a problem.
If you are having issues upgrading and have third-party repositories installed on your system, you may need to disable these repositories while you are upgrading. For support with repositories not provided by Fedora, please contact the providers of the repositories.
2018年9月4日 星期二
CentOS_7 & Ubuntu 更新Firefox版本
1.用你本地的舊版 firefox,訪問http://www.firefox.com.cn,下載Linux版本的Firefox,因為我的是64位故選擇的安裝包是:”Firefox-latest-x86_64.tar.bz2“。
2.進入存放下載文檔(Firefox-latest-x86_64.tar.bz2)的目錄。
3.在該目錄解壓 Firefox-latest-x86_64.tar.bz2。
解壓後會生成一個 firefox 子目錄,裏面有最新版本的 firefox 的二進制可執行文檔,以及各種擴展模塊,插件等等。
tar -xjvf Firefox-latest-x86_64.tar.bz2
3.由於有時解壓後出來的文檔缺少文檔(原因不明),可以採用在外部解壓好後,直接拷貝出firefox文檔夾的方式。
4.刪除系統默認安裝的舊版 firefox ,通常位於 /usr/lib64 目錄下。
CentOS : rm -rf /usr/lib64/firefox
ubuntu : rm -rf /usr/lib/firefox
5.將當前目錄下的新版 firefox 子目錄複製到 /usr/lib64 目錄下。
CentOS : mv firefox /usr/lib64
ubuntu : mv firefox /usr/lib
6.進入 /usr/bin 目錄,刪除其下的 firefox 腳本。
cd /usr/bin
rm firefox
7.回到主目錄或根目錄,創建一個軟鏈接,指向/usr/lib64/firefox/firefox。
CentOS:
cd
ln -s /usr/lib64/firefox/firefox /usr/bin/firefox
Ubuntu:
cd
ln -s /usr/lib/firefox/firefox /usr/bin/firefox
8.查看下最新版本
firefox -v
2018年8月26日 星期日
Linux 查看記憶體指令
Linux 查看記憶體(RAM)指令
Linux 如何查看 系統硬體 的 詳細記憶體(RAM)資訊
在 Linux 要查詢記憶體大小, 可以用下述指令:
- free
- free -m
- cat /proc/meminfoMemTotal: 8088504 kB
MemFree: 337408 kB
Buffers: 175136 kB
Cached: 6873848 kB
SwapCached: 0 kB
Active: 4396244 kB
Inactive: 3057212 kB
要查詢詳細的 RAM 規格, ex: DDR2、DDR3 .. 等, 可以用下述指令:
- sudo lshw*-memory
description: System Memory
physical id: 22
slot: System board or motherboard
size: 8GiB
*-bank:0
description: DIMM DDR3 Synchronous 1333 MHz (0.8 ns)
product: 99U5403-034.A00G
vendor: Kingston
physical id: 0
serial: 483C2FE
slot: DIMM0
size: 4GiB
width: 64 bits
clock: 1333MHz (0.8ns) - dmidecode -t 17 # 等同 dmidecode --type memory、 dmidecode --type 17# dmidecode 2.11
SMBIOS 2.6 present.Handle 0x0022, DMI type 16, 15 bytes
Physical Memory Array
Location: System Board Or Motherboard
Use: System Memory
Error Correction Type: None
Maximum Capacity: 32 GB
Error Information Handle: No Error
Number Of Devices: 2Handle 0x0025, DMI type 17, 28 bytes
Memory Device
Array Handle: 0x0022
Error Information Handle: No Error
Total Width: 64 bits
Data Width: 64 bits
Size: 4096 MB
Form Factor: DIMM
Set: None
Locator: DIMM0
Bank Locator: BANK0
Type: DDR3
Type Detail: Synchronous
Speed: 1333 MHz
Manufacturer: Kingston
Serial Number: 483C2FE
Asset Tag: AssetTagNum0
Part Number: 99U5403-034.A00G
Rank: 2
訂閱:
文章 (Atom)